How to install an external heat pump for your spa 2024

A heat pump is an energy efficient, cost-effective way to heat your spa or swim spa. In this article, we explain what you need to know before installing a heat pump to your spa or swim spa.

External heat pump for spa hero

Disclaimer: A licensed electrician must carry out all electrical work on your spa. Any electrical information included here, whether it is troubleshooting or other instructions, are provided for use by a licensed electrician only. Local electrical codes supersede any information found here.

Installing a heat pump to your spa or swim spa can result in significant savings to your heating bill, meaning you can keep your spa warm and ready to use all year round for a lot less cost.
Please note, this guide is designed for existing Spa World customers. If you are not a Spa World customer and have bought a heat pump through another retailer, you will need to contact them for installation advice.

Watch: What to consider before a heat pump installation

What size heat pump do I need for my spa pool?

Before you buy and install a heat pump for your spa, you'll need to ensure you select the right model.

As a general guideline, a small spa pool (up to 2500 litres) may require a 5.5kW heat pump, while a medium-sized spa pool (2500 to 7000 litres) will need an 8kW heat pump. Larger spa pools and swim spas (over 7,000 litres) may require a heat pump with a kW rating of 12 or higher.

However, it's essential to note that these are just general estimations, and it's recommended to consult with a professional who can properly evaluate your specific spa pool requirements and provide an accurate recommendation for the kW rating of the heat pump.

They will consider factors like insulation, location, usage patterns, and climate conditions to determine the appropriate size of the heat pump for your spa pool.

Please note: Smaller-capacity heat pumps than these recommendations will work, however, they will take a lot longer to heat your spa water and will use more energy.

What Heat Pumps are compatible with what spa models?

All Vortex ™ and Fisher™ Spa models are compatible with heat pumps. However, not all spas are set up to work with heat pumps.

To be safe, if you are interested in another spa brand, we recommend asking the retailer if the spa can be equipped with a heat pump.

Standard Heat Pump Installation

A standard installation is one that is on an easily accessible, prepared site and within a 50km radius of the nearest Spa World store.

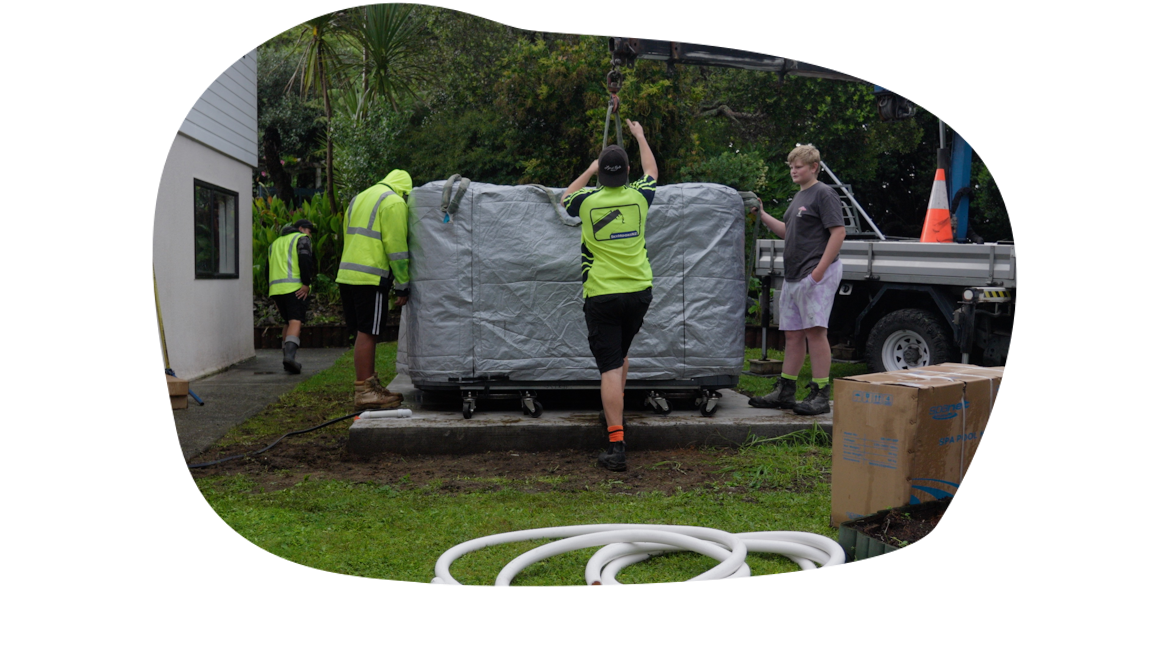
The spa or swim spa must be in position, filled and connected to power before the heat pump installation is booked.

Key things to know:

  • The site needs to be open and ready for installation. Work such as trenching and removal of deck boards is not included with a standard installation and must be done prior to the technician’s arrival on site.
  • No electrical work is included other than being able to plug the power cord into the control box.
  • The customer needs to provide a level stable foundation for installation.
  • The heat pump foundation should be installed at the same height as the spa slab, where possible, to avoid the requirement for unnecessary additional plumbing.
  • The heat pump also has a condensate drain, just like an air conditioner, so the area under the heat pump will get wet.
  • Anything other than standard installation will require a technician to contact the customer and assess the requirements directly and provide a separate quote.

Why can't Purezone™ filters be used with Hybrid Heat Pumps?

If a Purezone™ filter is installed in a spa, it is not recommended to use it together with a hybrid heat pump. This is because the Purezone™ filter restricts water flow significantly, which can lead to a water flow error in the spa system.

Hybrid heat pumps require a certain amount of water flow to operate correctly, and using a Purezone™ filter can disrupt this flow and cause issues.

To ensure the optimal operation of a hybrid heat pump with a spa, it is advisable to use pleated filters that are specifically designed for heat pumps. These filters are designed to allow sufficient water flow while still providing adequate filtration.

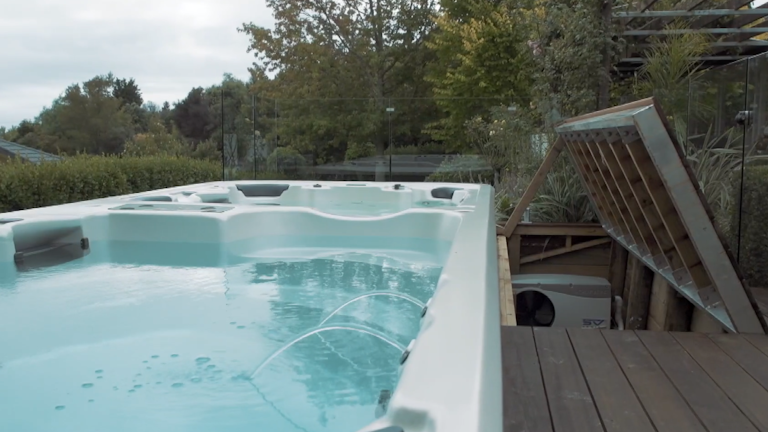
spa heat pump in deck

Watch: Installing a swim spa and heat pump - start to finish

How to install a heat pump for a spa pool or swim spa

Follow the instructions below for installing a heat pump on your spa or swim spa.

These instructions apply to:

  • Vortex™ Spas (Excluding Vortex™ Gemini spas)
  • Vortex™ Swim Spas
  • Fisher™ Swim Spas

They do not apply to Vortex Gemini Spas or Fisher Spa Portable Spas. If you have a Vortex™ Gemini Spa or Fisher Portable Spa refer to the instructions below for ‘Vortex™ Gemini heat pump connection’.

If you have another brand of spa, please refer to the manufacturer's instructions.

  1. Turn off the spa and close the shut-off valves to the circulation pump and controller.
  2. Consult the SpaNet™ installation manual that came with your spa, for instructions on connecting the power and control wire.
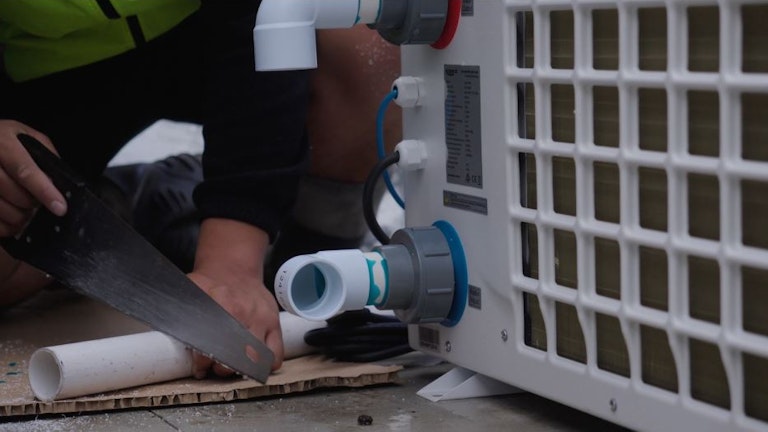
Cutting a spa heat pump pipe
  1. Cut the horizontal 40mm pipe between the circulation pump and the SpaNet™ SV Series controller
  2. Cut holes into the cabinet where the pipe will run into the heat pump, be sure to cut the holes at a height that allows the pipes to remain even and supported on the cabinet.
  3. Run a 40mm pipe from the circulation pump to the inlet of the heat pump.

Note: Depending on the installation of your heat pump, your Vortex™ Purezone™ filter may need to be replaced with a paper filter. If you receive a flow error, shut down the spa and replace the Purezone™ filter with a paper filter before restarting. If the problem persists please ring the service number.

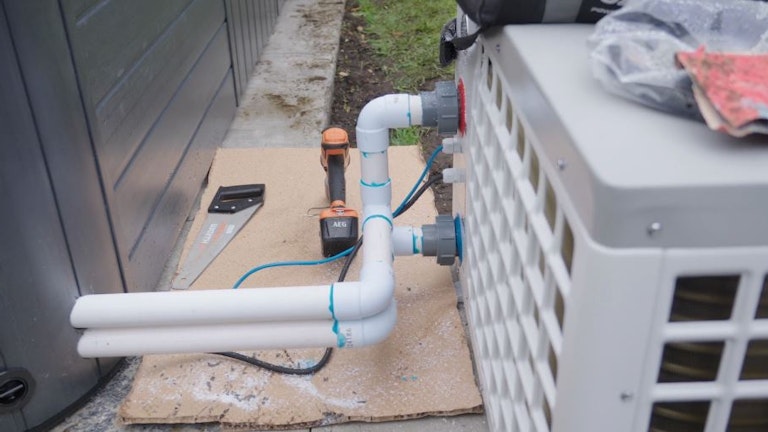
Spa heat pump connection
  1. From the outlet of the heat pump, run a 40mm pipe to the inlet of the SV Controller. Note: You must use PVC hard pipe on the outside of the spa, flexible pipe may only be used internally.
  2. Open the shut-off valves.
  3. Undo the top outlet on the heat pump to bleed air out of the system.
  4. Close it once the water comes out and then switch on the spa.
  5. Make sure the circulation pump is flowing and is free of any air locks.

Tools and parts required:

  • 40mm or larger hole saw
  • PVC Pipe Glue
  • Hacksaw
  • 40mm hard pipe
  • 40mm Joiners and elbows

(The amount of pipe or fittings required will depend on your installation)

Vortex™ Gemini Spa heat pump connections

  1. Turn off the spa and close the shut-off valves to the circulation pump and controller. (Marked 1 on the diagram)
  2. Consult the Spa Net installation guide to connect the power and control wire.
  3. Cut the horizontal 40mm pipe between the circulation pump and the spa controller.
  4. Connect the circulation pump side of the cut to the pipework on the inlet side of the heat pump.
  5. Connect the spa controller side of the cut, to the pipe on the outlet side of the heat pump
  6. Cut holes into the cabinet where the pipe will run into the heat pump, be sure to cut the holes at a height that allows the pipes to remain even and supported on the cabinet.
  7. Run a 40mm pipe form the circulation pump to the inlet of the heat pump.(Depending on the installation of your heat pump, your pure zone filter may need to be replaced with a paper filter, if you receive a flow error, shut down the spa and replace the pure zone with a paper filter before re-starting, if the problem persists please ring the service number).
  8. From the outlet of the heat pump, run a 40mm pipe to the inlet of the SV mini heater Note: You must use PVC hard pipe on the outside of the spa, flexible pipe may only be used internally.
  9. Open the shutoff valves.
  10. Undo the top outlet on the heat pump to bleed air out of the system.
  11. Close it once the water comes out and then switch on the spa.
  12. Make sure the circulation pump is flowing and is free of any air locks.

Tools and parts required:

  • 40mm or larger hole saw
  • PVC Pipe Glue
  • Hacksaw
  • 40mm hard pipe
  • 40mm PVC joiners, and elbows

(The amount of pipe or fittings required will depend on your installation)

Other things to consider when installing a spa heat pump

The heat pump model

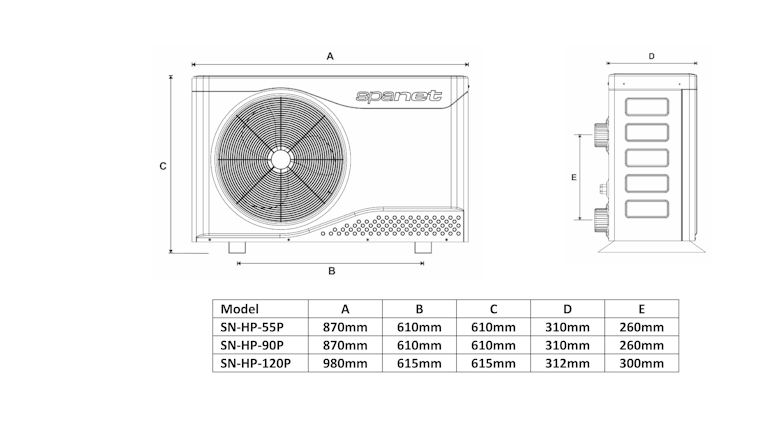
SpaNet™ SV Series Heat Pumps come in three different models, each with different measurements. Check the diagram below to confirm the measurements of your particular heat pump model.

spanet dimensions

The power cable

Your heat pump comes with a 5m power cable and a data cable. Both cables need to be connected to the spa’s controller at the time of installation. The heat pump needs to be installed so that they can reach between the heat pump and the spa controller. For this reason, we suggest installing the heat pump no more than 3m from the spa’s controller. You will need to factor in the complete cable run as this may increase the distance between the heat pump and spa.

Safety barriers

If your heat pump is to be installed outside of your fenced pool area, please consider your local pool safety barrier requirements, especially in consideration of a non-climbable zone. You will also need to consider the position of the plumbing exiting and entering the spa if you are utilising the walls of the spa as part of your pool safety barrier ie. you are fencing around your steps only.

Distance from spa base

Your heat pump can not be installed more than 1 metre higher or lower than the base of the spa. If installed above or below the base of the spa you cannot install the unit more than two metres away from the spa controller.

The base of the heat pump

The heat pump must sit on either a concrete base or well-laid concrete paving stones. The most common solution is to pour a pad extension for the heat pump when the main pad is poured.

Heat pump in a trench or below ground

If you are installing the electrical and plumbing for your heat pump in a trench, there are a number of things you must consider. For information on installing a heat pump below ground or in a trench, click the button below.

Clearance in front of the heat pump

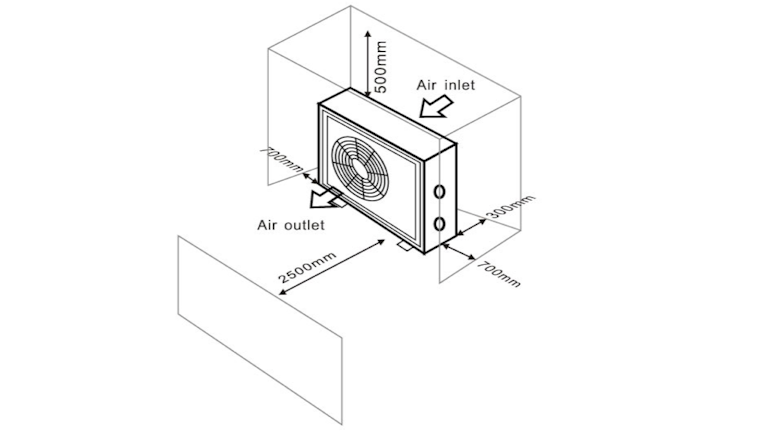
The heat pump moves a lot of air so both the back and front of the heat pump must be completely unobstructed. The manufacturer recommends 300mm at the back, 700mm on each side and 2.5m to the front of the unit. See image below as an example.

spanet sv heat pump air flow requirement

If you are planning to install the Heat Pump below the decking in a pit or similar, you must ensure the clearances detailed above are maintained for maximum efficiency.

Need more help?

We hope this information has been helpful. If you have any questions or concerns about your heat pump installation, please contact your Spa World concierge.

Five Star Trust Pilot Rating

We are proud that Spa World customers have given us a Five Star Trustpilot rating.