Important note: This installation guide applies to Jacuzzi® J-200™ models made before 2025. For 2025 models, refer to the user manual for specific maintenance instructions.
How to Install a Jacuzzi® J-200™ Series Drain Valve | A Step-by-Step Guide
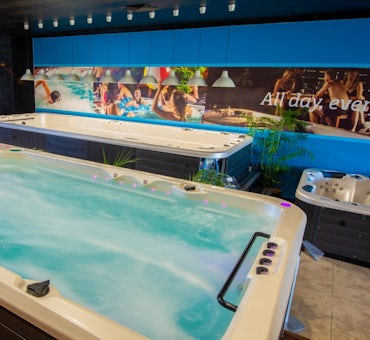
Is it time to drain your Jacuzzi® J-200™ Series spa? Before you begin, you'll need to install the drain valve. This guide walks you through the process step-by-step and can help resolve issues like slow draining or difficulty emptying caused by a faulty valve.
A drain valve in spa pools serves a crucial purpose: it provides a simple and efficient way to drain water for cleaning and maintenance.
In this article, you'll find a step-by-step guide to installing a drain valve on your Jacuzzi® J-200™ Series spa, making the process straightforward and manageable.
Key Takeaways
- Purpose: Enables easy water drainage for cleaning or maintenance.
- Tools Needed: Screwdriver, pliers, wrench, optional hose clamp tool.
- Steps: Remove the plug, install the valve, reconnect the hose, and reattach the panels.
- DIY-Friendly: Simple 8-step process for spa owners and technicians.
What tools do I need to install a Jacuzzi® J-200™ Series Drain Valve?
To install a Jacuzzi® J-200™ Series drain valve, you will need the following tools:
- Screwdriver: A Phillips or flathead screwdriver may be required to remove screws from the cabinet panels.
- Pliers: Useful for gripping and loosening hose clamps.
- Socket Wrench or Adjustable Wrench: To tighten or loosen the locking ring on the drain valve.
- Hose Clamp Tool (optional): This can help if the hose clamps are particularly tight or difficult to manage by hand.
Having these tools ready will facilitate a smoother installation process for your drain valve.
Step-by-Step Instructions: Installing a Jacuzzi® J-200™ Series Drain Valve
Follow these steps to install a drain valve on your Jacuzzi® J-200™ Series correctly.
Step 1: Make sure the spa is empty
Ensure the spa is empty before starting the installation steps.
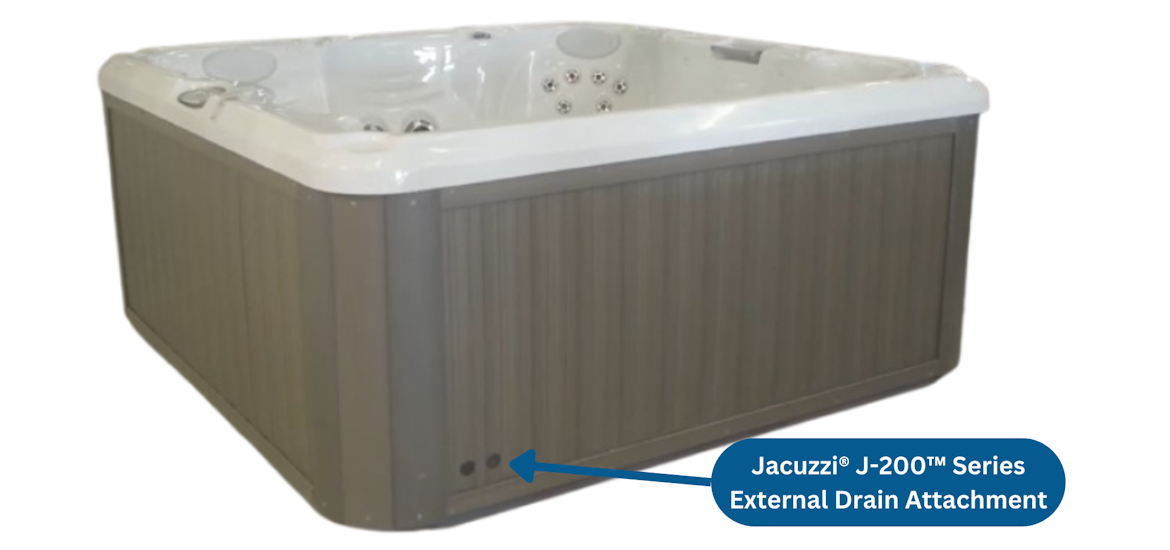
Step 2: Locate and Remove the Drain Valve Plug
- Identify the drain valve plug located on the cabinet panel. When facing the control keypad, the external drain attachment will be on the right side of the spa.
- Carefully remove the plug from the panel.
Step 3: Remove the Front Cabinet Panel
- Find the front cabinet panel located under the touchpad area.
- Unscrew and remove the top rail and one corner slat.
- Once these are removed, lift out the cabinet panel to expose the internal components.
Step 4: Locate the Drain Valve Inside the Cabinet
With the cabinet panel removed, locate the drain valve inside the cabinet.
Step 5: Detach the Valve from the Hose
Carefully disconnect the drain valve from the attached hose.
Step 6: Insert the Drain Valve into the Cabinet Panel
- Remove the locking ring located at the rear of the valve.
- Insert the drain valve through the opening in the side cabinet panel where the plug was removed in Step 1.
Step 7: Reattach the Locking Ring
- Screw the locking ring back onto the rear of the valve.
- Hand-tighten the locking ring to secure the valve in place.
Step 8: Reconnect the Hose
- Push the hose all the way back onto the barb at the rear of the valve.
- Slide the hose clamp over the hose and the barbed section to ensure a secure fit.
Step 9: Reinstall the Cabinet Panels
- Reinstall the front cabinet panel by aligning it and securing it with the top rail and corner slat you removed earlier.
- Ensure all screws and components are firmly in place.
In Summary
We hope you now feel confident about replacing the drain valve on your Jacuzzi® J-200™ Series spa. If you’ve been dealing with slow drainage, leaks, or difficulty emptying your spa, installing a new drain valve is a simple and effective solution.
By following these steps—removing the old plug, securing the new valve, reconnecting the hose, and reinstalling the cabinet panels—you can ensure your spa drains efficiently and remains in top condition.
With the right tools and guidance, both spa owners and technicians can handle this task easily.
Got more questions? We’re here to help!


Related Articles

Jacuzzi® J-200™ Collection Spa Spa Pool Maintenance Guide
Your new Jacuzzi® spa is an investment that you’ll want to look after. In this article, we explain how to properly maintain the filters, pillows and spa cover on a Jacuzzi® J-200™ spa, to ensure they operate effectively and stand the test of time.


How to use the controls and features of Jacuzzi® J-200™ Collection Spa
Looking to get the most out of your spa? In this article, we’ll take a look at the top features and controls of the Jacuzzi® J-200™ Collection Spa, so you can enjoy your spa to the fullest.