How to install Cabinet Free Spa Cover Lifter

The Cabinet Free Spa Cover Lifter is compatible with Vortex™ & Fisher™ spas on standalone concrete pads and on top of a deck. This detailed guide provides easy, step-by-step instructions to help you install it quickly and efficiently.

cabinet free spa cover lifter scl 01

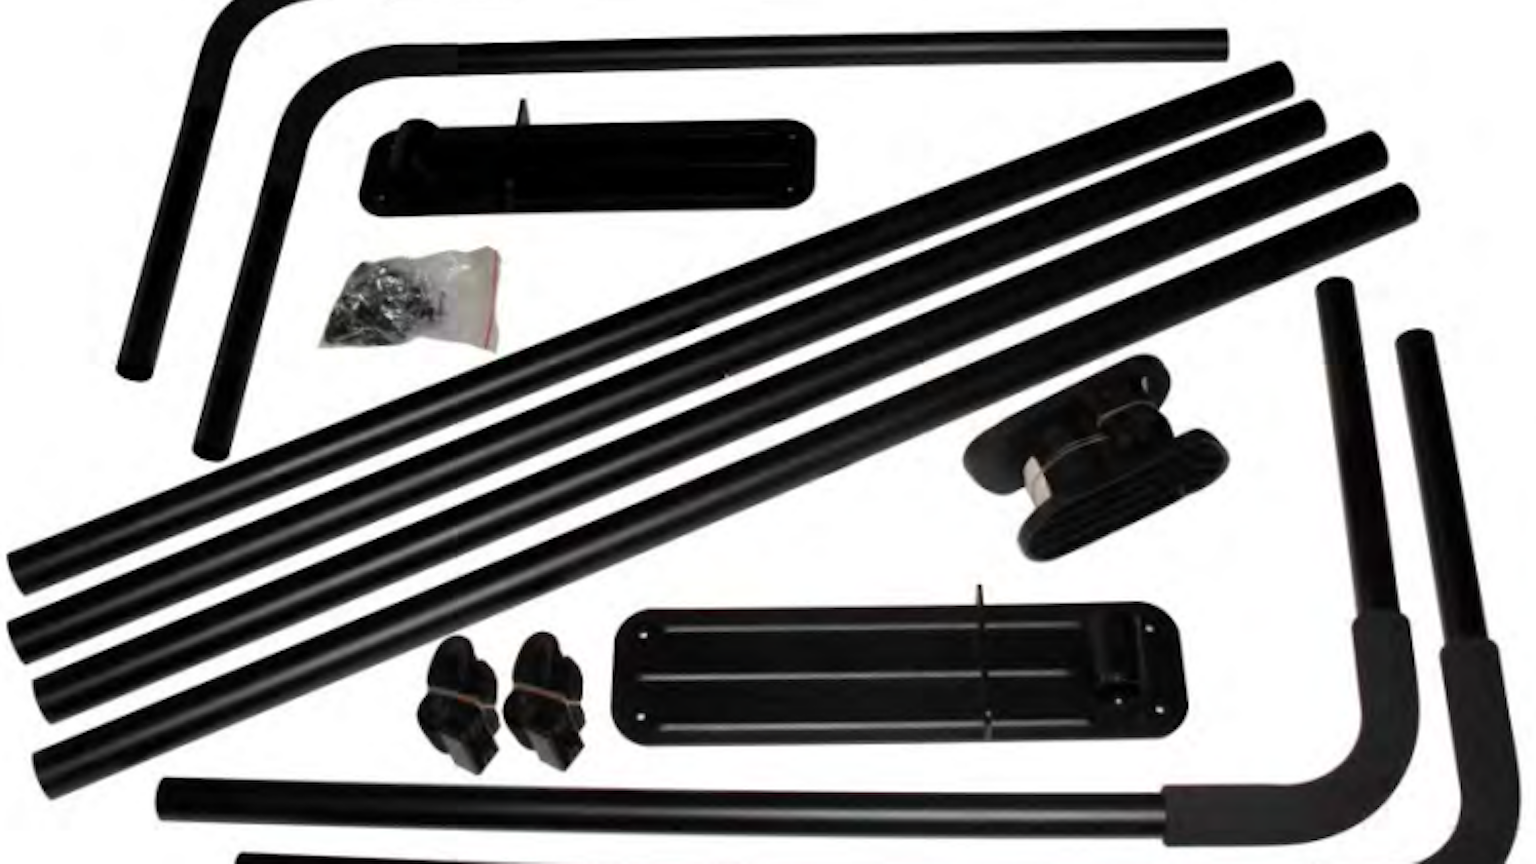
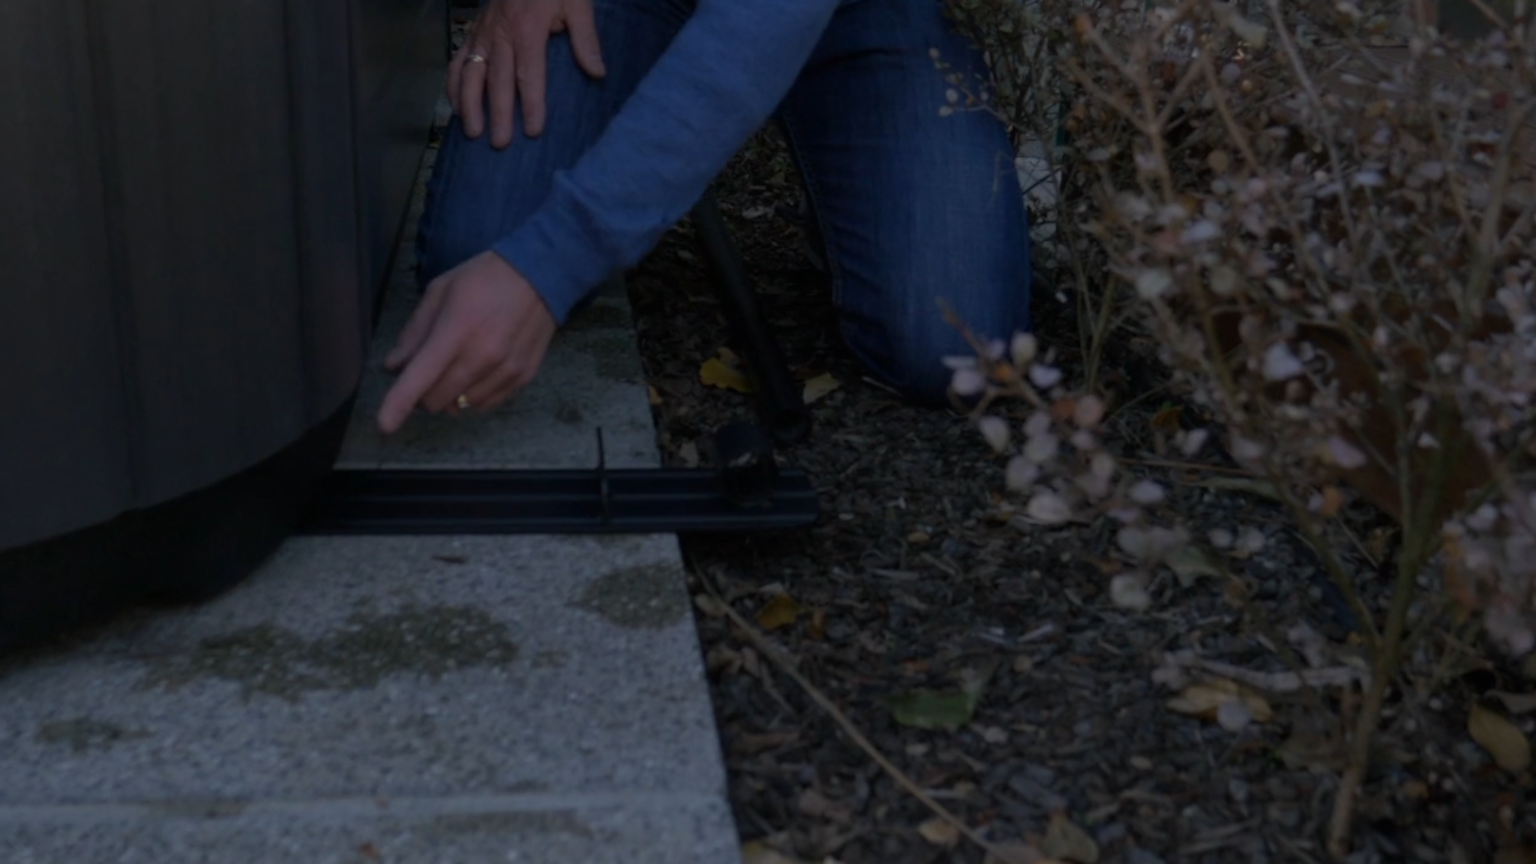
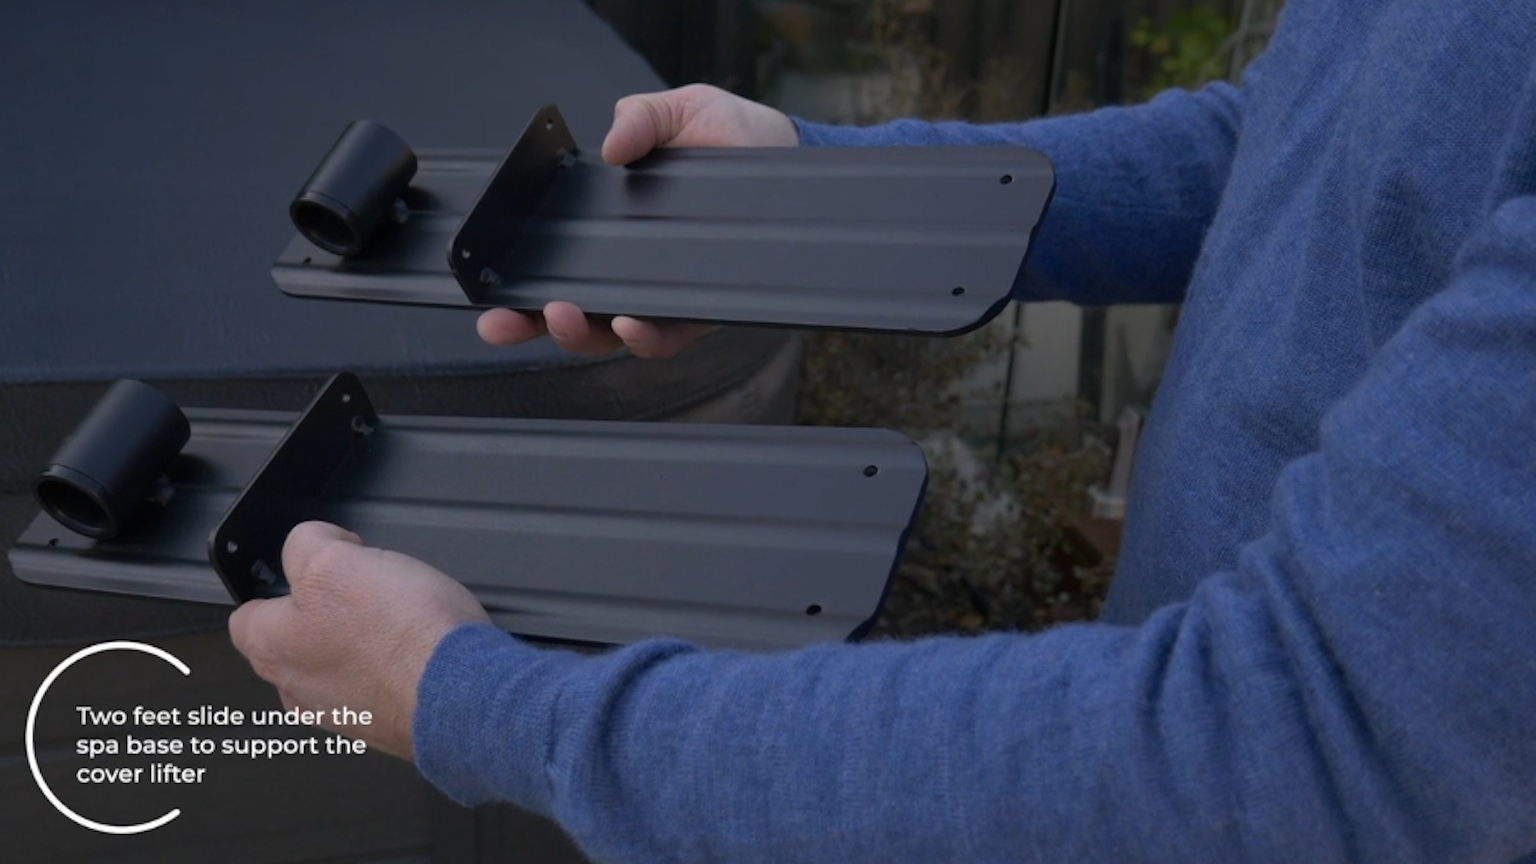
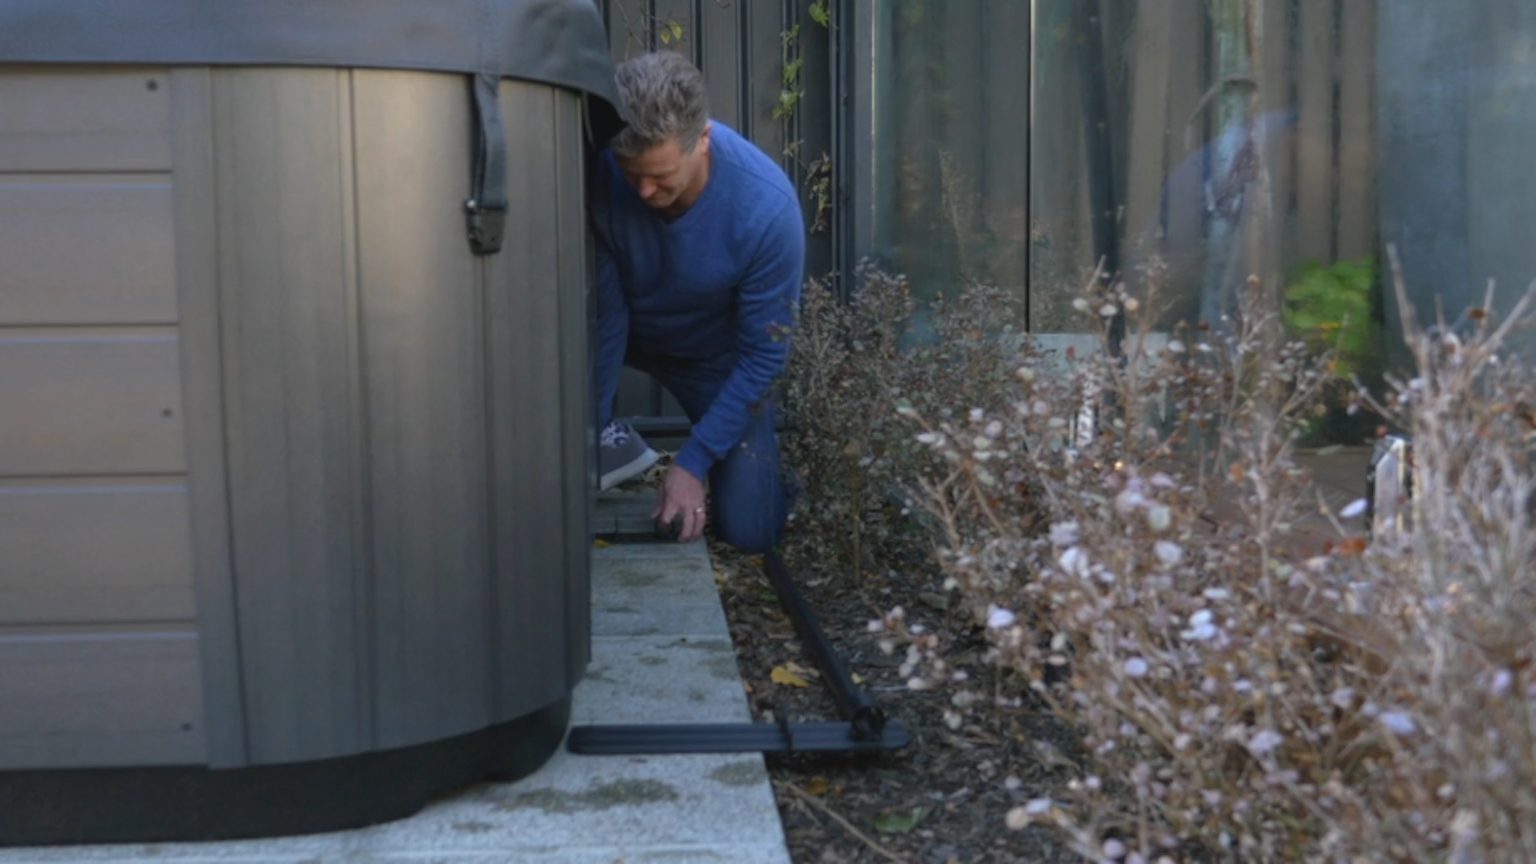
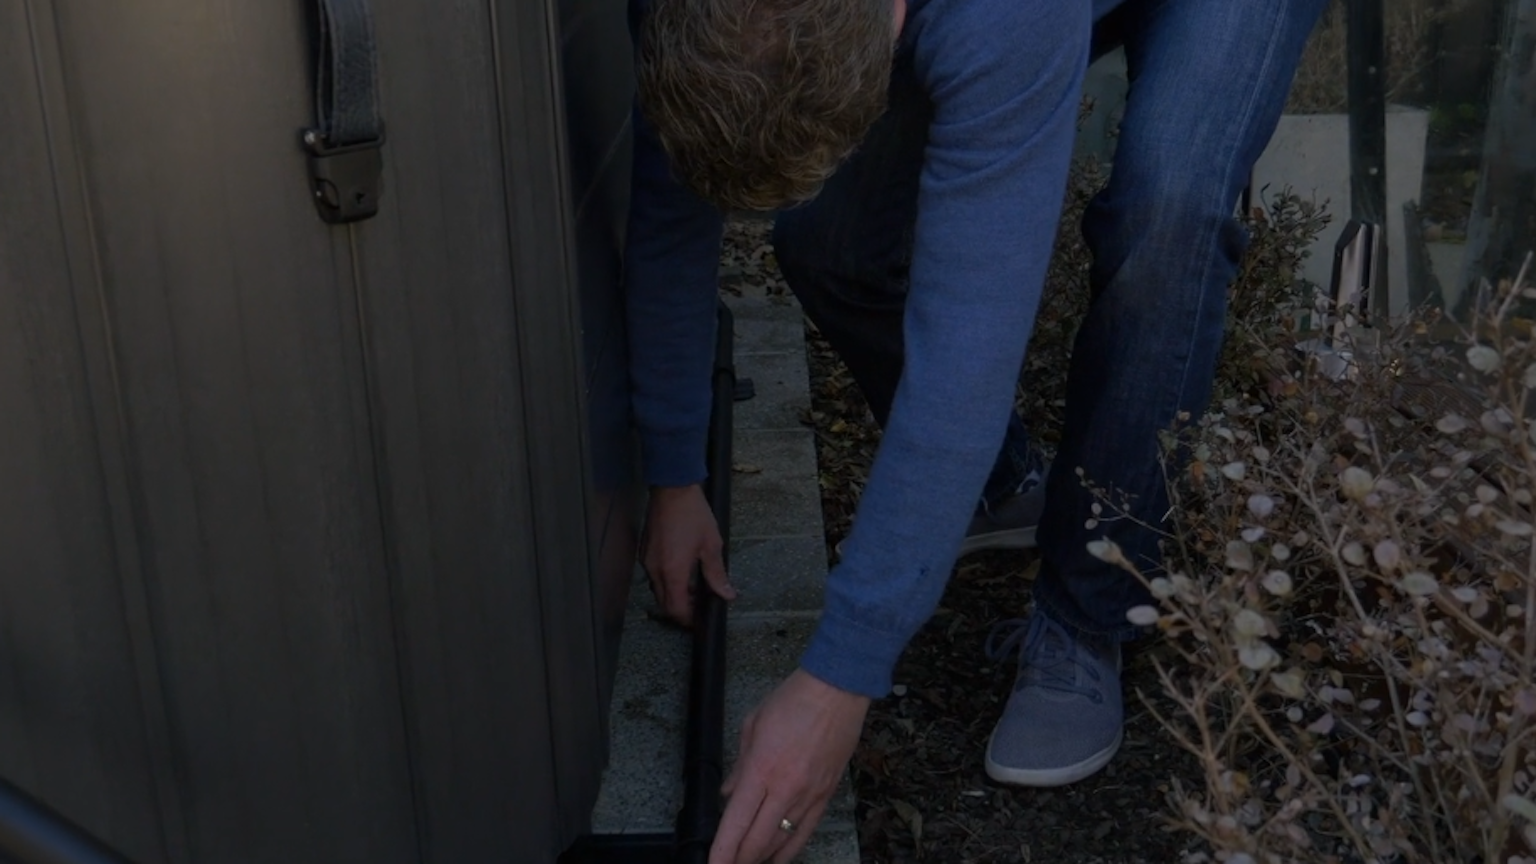
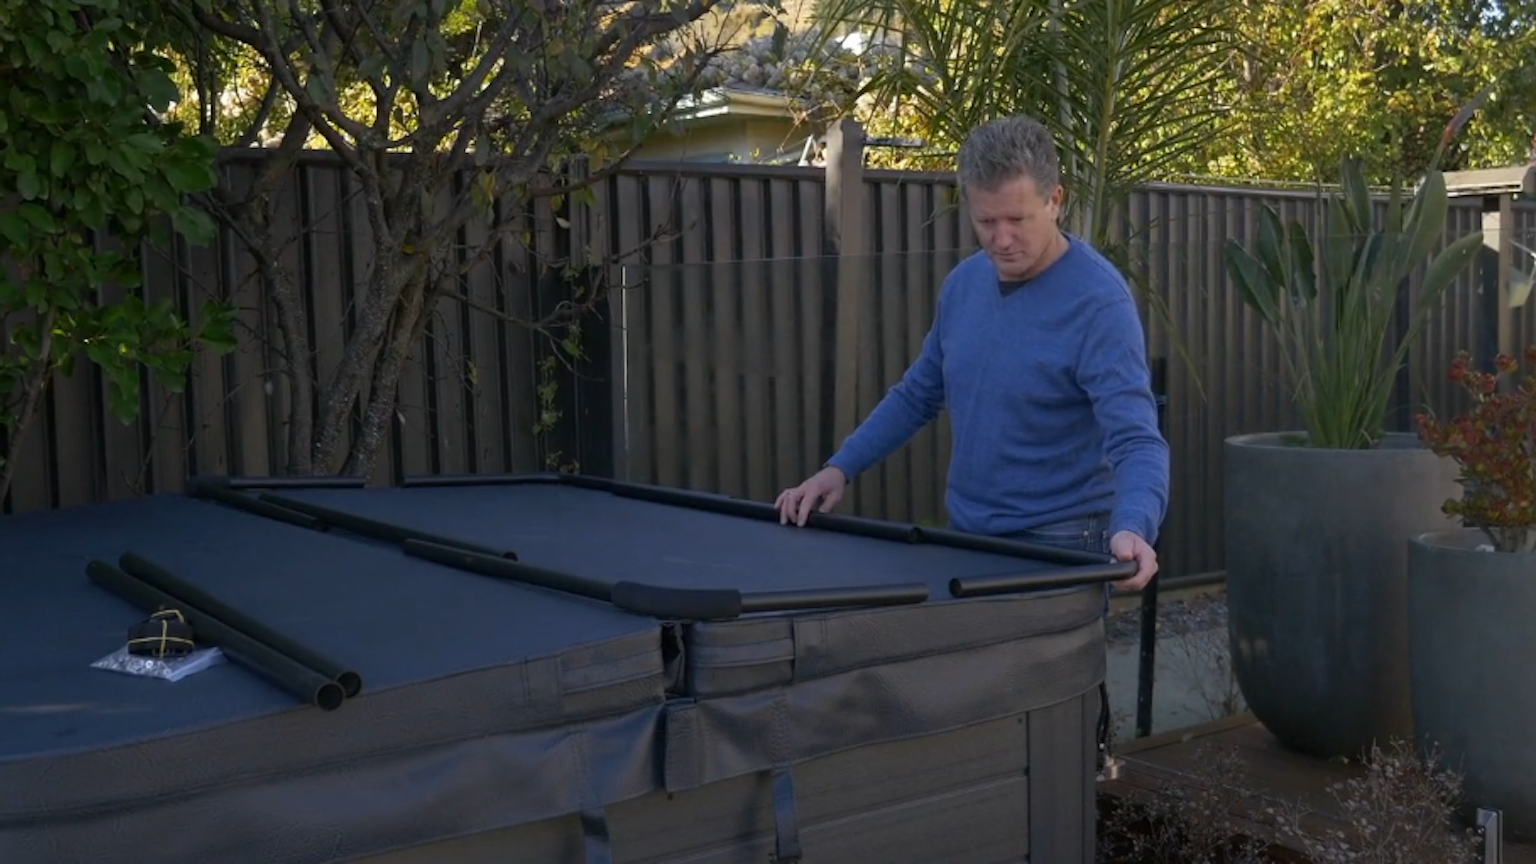
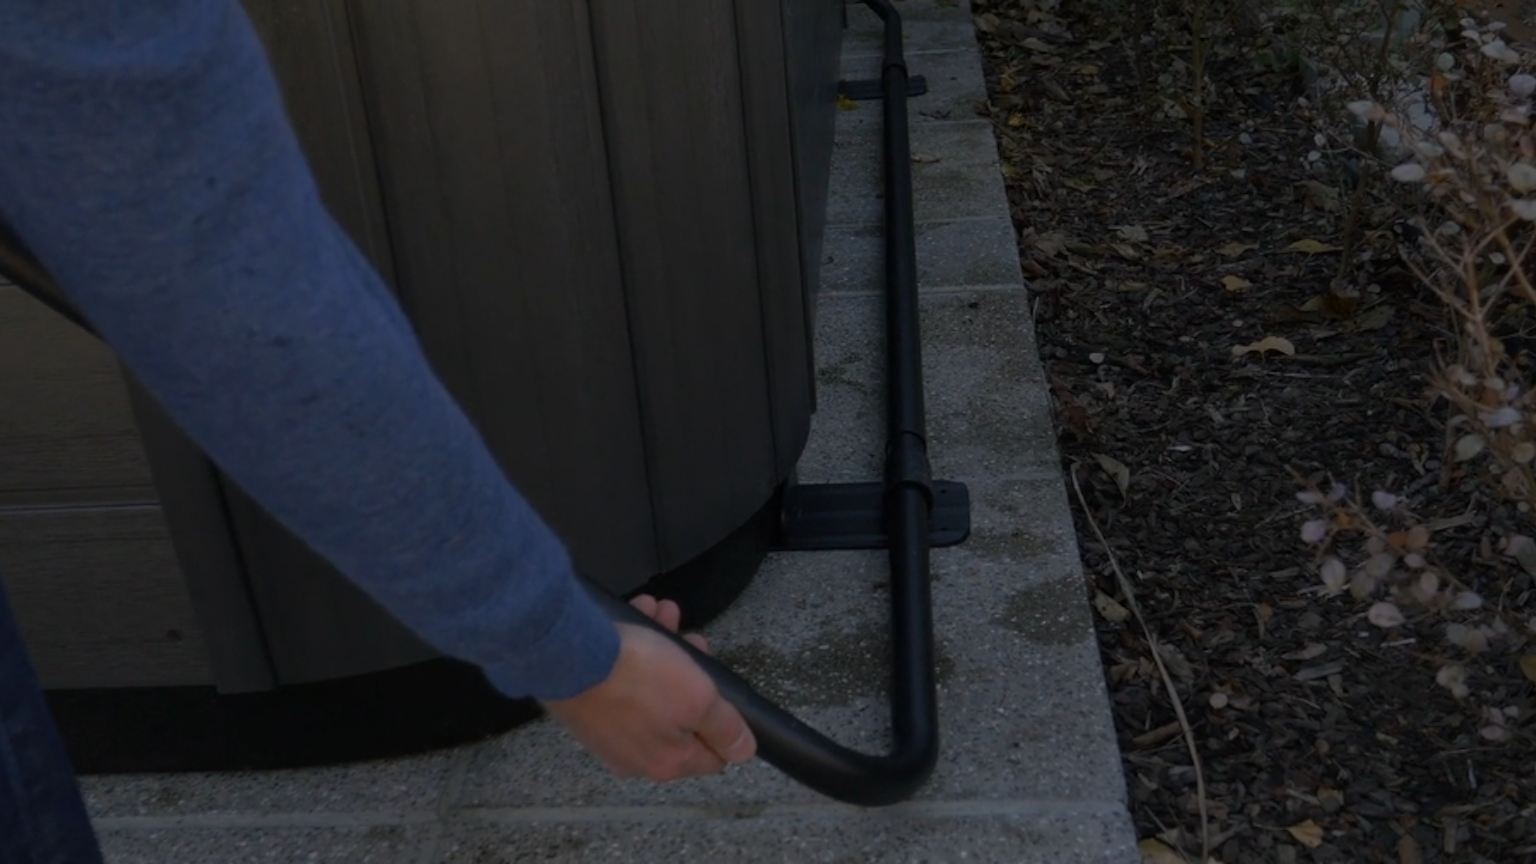
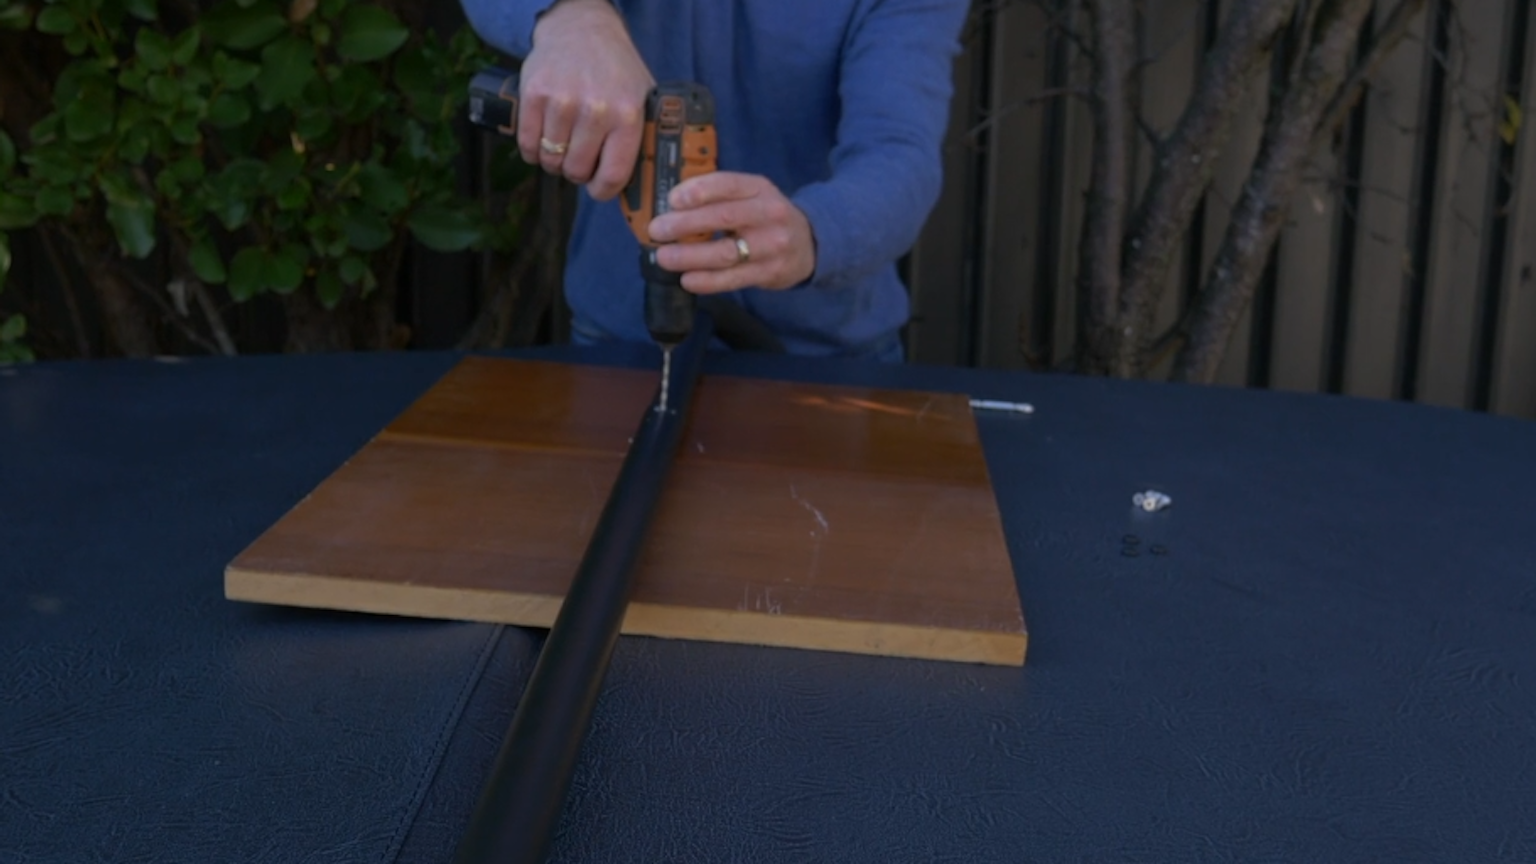
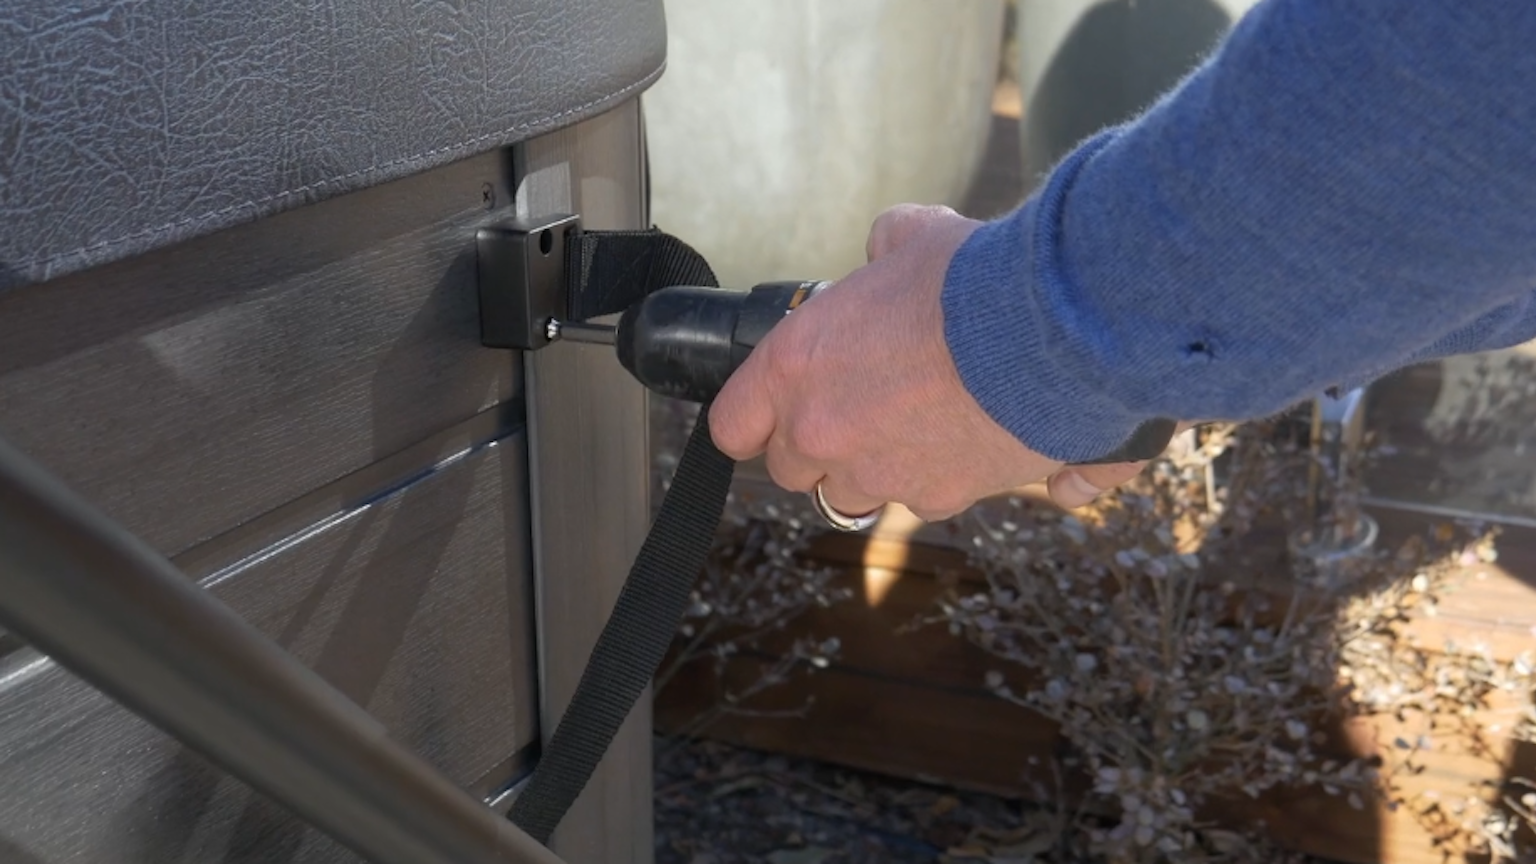
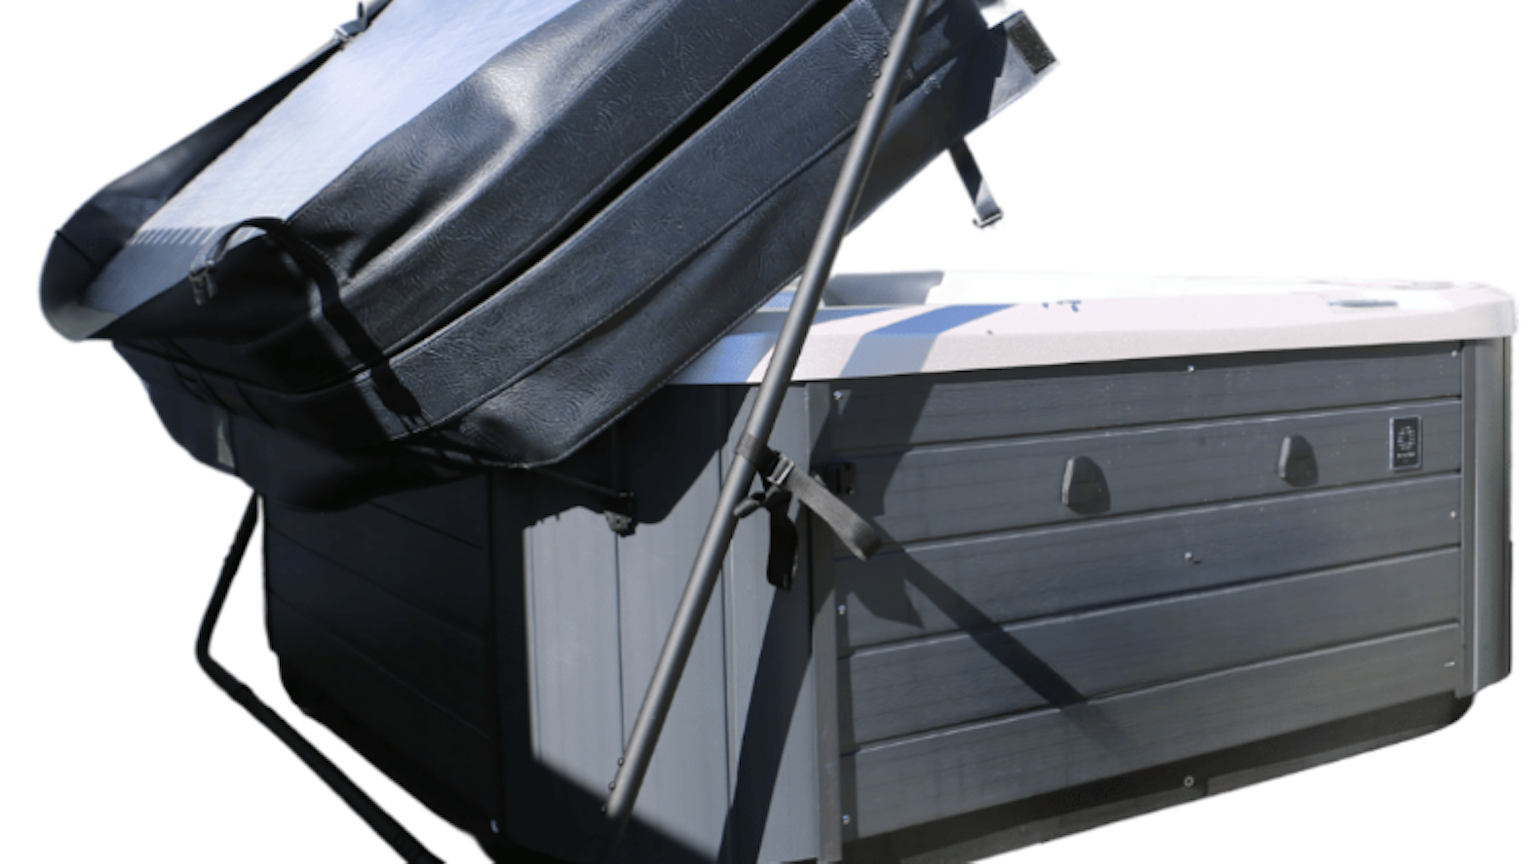
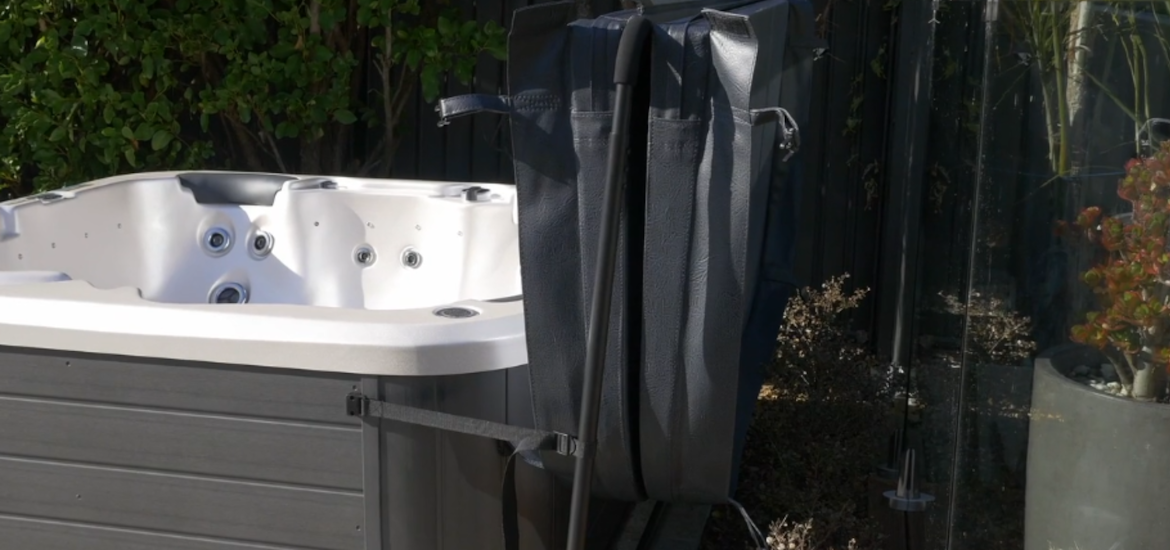
Installing a cover lifter on your spa pool makes removing and replacing your spa cover much easier. Plus, it also helps protect your cover from wear and tear so that it will last longer, saving you money in the long run.

This article walks you through each step to properly attach the SCL-01 cover lifter brackets, arms, and straps, ensuring stability and ease of use.

Key Takeaways

  • Learn to install the Cabinet Free Spa Cover Lifter step-by-step.
  • Ensure proper alignment and secure attachment.
  • Set up the Cover Saver to protect your spa cover.
  • Avoid common installation mistakes.
  • Confirm spa model compatibility.

What spa models are compatible with the Cabinet Free Spa Cover Lifter?

The Cabinet Free Spa Cover Lifter (SCL-01) is compatible with Vortex™ and Fisher™ spa pools on standalone concrete pads and on top of a deck.

It also fits the Jacuzzi® J-200™ Series installed standalone or recessed into a deck.

What parts come with the Cabinet Free Spa Cover Lifter?

Before starting the assembly, take a moment to review the parts in your kit and confirm you have all the following components:

scl 01 parts
  • 2 - Cabinet Free Lifter Bracket
  • 2 - 1-1/8” Bent Arm w/o Foam
  • 2 - 3/5” Black Tek Screw
  • 1 - Cover Saver Package
  • 1 - Phillips Driver
  • 8 - 1 2/5” Wood Screw
  • 2 - 1/5” PVC Bushing Screw
  • 4 - 1 5/16” Coupler Tube
  • 2 - 1-1/8” Bent Arm w/ Foam
  • 2 - Nylon Pivot Strap
  • 42 - Black PVC Push Cap
  • 2 - 1/8” Drill Bit
  • 8 - 1” Spa Floor Screw
  • 24 - 1” Black Tek Screw

Cabinet Free Spa Cover Lifter (SCL-01) | Step-by-Step Installation Guide

Please follow the instructions below to install the Cabinet Free Spa Cover Lifter.

Note: All left and right directions are from standing in front of the spa. (The cover lifter will be installed at the back of the spa).

Step 1: Raise and Block the Spa.

cover lifter bracket under the spa
spa cover lifter bracket/feet
  • Raise and block the spa. In most instances, you will need to empty your spa in order to install this lifter because the feet slide under the spa. In some cases, you can install it on full spas by using a wedge to make room for the cover foot, however, depending on the spa model this can damage the base.
  • Brackets should be placed under the spa floor at least 1/4 of the spa width from each side.

Step 2: Confirm Bracket Location.

placing cover lifter feet under the spa

Confirm that the bracket location is correct and square, remove blocking, and lower the spa onto the brackets.

Step 3: Secure the Bracket.

Ensure the brackets are firmly in place. For additional security, you have the option to screw the brackets into the spa floor or deck.

Step 4: Place Bent Arms.

cover lifter arms

Place the bent arm (without foam) through PVC bushings at the bottom of each bracket.

Step 5: Connect Bent Arms.

connecting cover lifter bent arms

Use one straight coupler to connect the two bent arms to each other, ensuring that the coupler is centred.

Step 6: Attach Straight Couplers.

attaching cover lifter couplers

Place a straight coupler over the top of the bent arm on the right side. Repeat on the left.

Step 7: Slide the Nylon Strap Over the Coupler.

Slide the nylon strap over the coupler on each side.

Step 8: Check Cover Alignment.

With the cover closed, in the closed position, make sure that the cover is square on the spa.

Step 8: Check Cover Alignment.

With the cover closed, in the closed position, make sure that the cover is square on the spa.

Step 9: Position Bent Arms on the Cover.

Place bent arms on the seam of the cover with the long part of the tube facing down.

Step 10: Connect Bent Arms to Coupler.

Use a straight coupler to connect the bent arms on the cover seam, then slide the long ends into the side straight coupler.

Step 11: Center Coupler Tube.

center coupler tube

Center the coupler tube in the middle of the spa cover.

Note: Turn the coupler tube so that the screw holes are directed toward the back of the spa. Also, use a piece of cardboard under the coupler arm in the fastening locations before screwing in Tek screws to protect the cover surface.

Step 12: Secure Couplers.

Screw all four couplers into place. There are 6 Tek screws per coupler.

Step 13: Attach Nylon Straps.

attach nylon straps
  • Stretch the nylon strap towards the centre of the spa with the cover lifter in the up position.
  • Secure it near the top of the cabinet by using a 1” (25mm) Spa Floor Screw provided. Repeat on the other side.

Step 14: Install Black Caps.

Install all black caps on screw heads.

Step 15: Fasten Straps to the Side Coupler.

Fasten the strap onto the side coupler bar by using the 3/5” Tek screw provided.

Step 16: Finalise Installation.

scl-01

The Lifter is now installed.

Cover Saver Installation | Step-by-Step Installation Guide

The Cover Saver protects your spa cover from damage caused by lifting mechanisms and helps evenly distribute the weight. This section provides simple steps to position and secure the Cover Saver for long-term durability and effectiveness.

Note: The Cover Saver is optional and is not included with the Cover Lifter.

Step 1: Center the Cover

spa cover lifter cover saver

Centre the cover on the spa so it is even on all four sides. The centre support bar has to be 1.5 inches (38mm) from the centre of the cover.

Note: When using the Cover Saver with new or existing lifters, make sure the centre is 1.5 inches (38mm) away from the centre. On existing lifters, you may have to adjust the side pivot arms by removing the screws to allow the cover support arms to move.

Step 2: Place Velcro Strips

velcro strips

Place one piece of Velcro 1 1/2 inches (38mm) from the inside edge of the cover handles on each side.

Note: Two supports need to be installed. To permanently apply Velcro, use silicon or Crazy Glue (not supplied). Skip this step for covers with pockets.

Step 3: Thread Straps Through Buckles

Thread the strap through the buckle as shown. Repeat for the other strap.

Part List:

  • 4 - 1 1/2” (38mm) pieces of adhesive Velcro
  • 2 - PA cover supports, including 145mm PP straps
  • 2 - 1 1/2” (38mm) POM buckles

In Summary

By following these instructions, you can ensure the Cabinet-Free Cover Filter and Cover Saver are installed properly, providing convenience and protection for your spa cover.

Got more questions? We’re here to help!

Related Articles

Five Star Trust Pilot Rating

We are proud that Spa World customers have given us a Five Star Trustpilot rating.